Overview
这里做一个集中,尽管以前都是遇到时立即搜索,但是集中一下之后,看起来也很壮观的。
当然,欢迎完善它。
- https://github.com/hedzr/mirror-list
如何更好的浏览/阅读这篇文章:
-
可以寻找chrome插件 Github Markdown Outline Extension,但是我好像是拿来修订了之后才能使用的。
-
可以寻找chrome插件 HTML5 Outliner
- 在阅读平台上(仅有首版,不再更新,怪麻烦的):
-
在GH Pages:
https://hedzr.github.io/programming/tips/mirror-list-snapshot/
License
本文中给出的源码像其它软件开发代码一样采用 MIT,随便用。
本文的内容,基本上没版权,在公共域。部分内容摘抄自公共服务器,此时请直接查看相应的原始内容,我尽力给出链接指向。有的内容是摘编后的成品,则统一使用内容创作共用 CC4-BY-NC-SA。
本文的排版和组织,如果有所谓,MIT,你还是可以用,随便。
Tools
proxy_set
在 zsh/bash 环境中,你可能需要一个小型工具,其主体内容是这样的(有时候也许你需要少少的订正):
1
2
3
4
5
6
7
8
9
10
11
12
13
14
15
16
17
18
19
20
21
22
23
24
25
26
27
28
29
30
31
32
33
34
35
36
37
38
39
40
41
42
43
44
45
46
47
48
49
50
51
52
53
54
55
56
57
58
59
60
61
62
63
64
65
# PROXY_LINK='http://127.0.0.1:7890'
proxy_set() {
  local onoff=${1:-usage}
  if is_darwin; then
    local pip=$(ipconfig getifaddr en0 || ipconfig getifaddr en1)
  else
    local pip=$(hostname -I|awk '{print $1}')
  fi
  local link=${PROXY_LINK:-http://$pip:7890}
  proxy_print_status() {
    [ "$http_proxy" != "" ] && echo "http_proxy=$http_proxy"
    [ "$HTTP_PROXY" != "" ] && echo "HTTP_PROXY=$HTTP_PROXY"
    [ "$https_proxy" != "" ] && echo "https_proxy=$https_proxy"
    [ "$HTTPS_PROXY" != "" ] && echo "HTTPS_PROXY=$HTTPS_PROXY"
    [ "$all_proxy" != "" ] && echo "all_proxy=$all_proxy"
    [ "$ALL_PROXY" != "" ] && echo "ALL_PROXY=$ALL_PROXY"
  }
  proxy_set_off() {
    unset all_proxy ALL_PROXY http_proxy https_proxy HTTP_PROXY HTTPS_PROXY
  }
  proxy_set_on() {
    export http_proxy=$link
    export https_proxy=$http_proxy HTTPS_PROXY=$http_proxy HTTP_PROXY=$http_proxy all_proxy=$http_proxy ALL_PROXY=$http_proxy
  }
  proxy_set_invoke(){
    # for better compatibilities under macOS we assumed a child shell for cleanup the envvars.
    # but its can be simplify to these following:
    # proxy_set_on && eval "$@" && proxy_set_off
    bash -c "
    set -e
    proxy_set_off() {
      unset all_proxy ALL_PROXY http_proxy https_proxy HTTP_PROXY HTTPS_PROXY
    }
    proxy_set_on() {
      export http_proxy=$link
      export https_proxy=\$http_proxy HTTPS_PROXY=\$http_proxy HTTP_PROXY=\$http_proxy all_proxy=\$http_proxy ALL_PROXY=\$http_proxy
    }
    trap 'proxy_set_off' EXIT ERR
    proxy_set_on
    $*
    "
  }
  case $onoff in
  on|ON|1|yes|ok|enable|enabled|open|allow)
    proxy_set_on
    echo 'HTTP Proxy on (http)'
    ;;
  off|OFF|0|no|bad|disable|disabled|close|disallow|deny)
    proxy_set_off
    echo 'HTTP Proxy off (http)'
    ;;
  status|st)
    proxy_print_status
    ;;
  usage|help|info)
    echo 'Usage: proxy_set on|off|enable|disable|allow|deny|status'
    echo 'Or run proxy_set just like "tsock": proxy_set curl -iL https://google.com/'
    echo 'Type "proxy_set help" for more information.'
    proxy_print_status
    ;;
  *)
    proxy_set_invoke "$@"
    ;;
  esac
}
将它粘贴到你的 ~/.zshrc 或者 ~/.bashrc 的末尾就可以了。
重新打开终端窗口即可生效。
如果在终端环境中需要启动 HTTP 代理,则
1
proxy_set on
反之则
1
proxy_set off
这是有备无患的工具。终端中总是有着各种各样的情况,这个工具的作用像 tsock,只不过需要独立运行并启用。
如果你想像使用 tsock 那样使用 proxy_set,现在可以这样:
1
proxy_set curl -iL https://google.com/
proxy_set help 可以查看 proxy_set 的使用方法。
只想看看状态的话:
1
proxy_set
这将会显示出当前的 HTTP_PROXY 值。
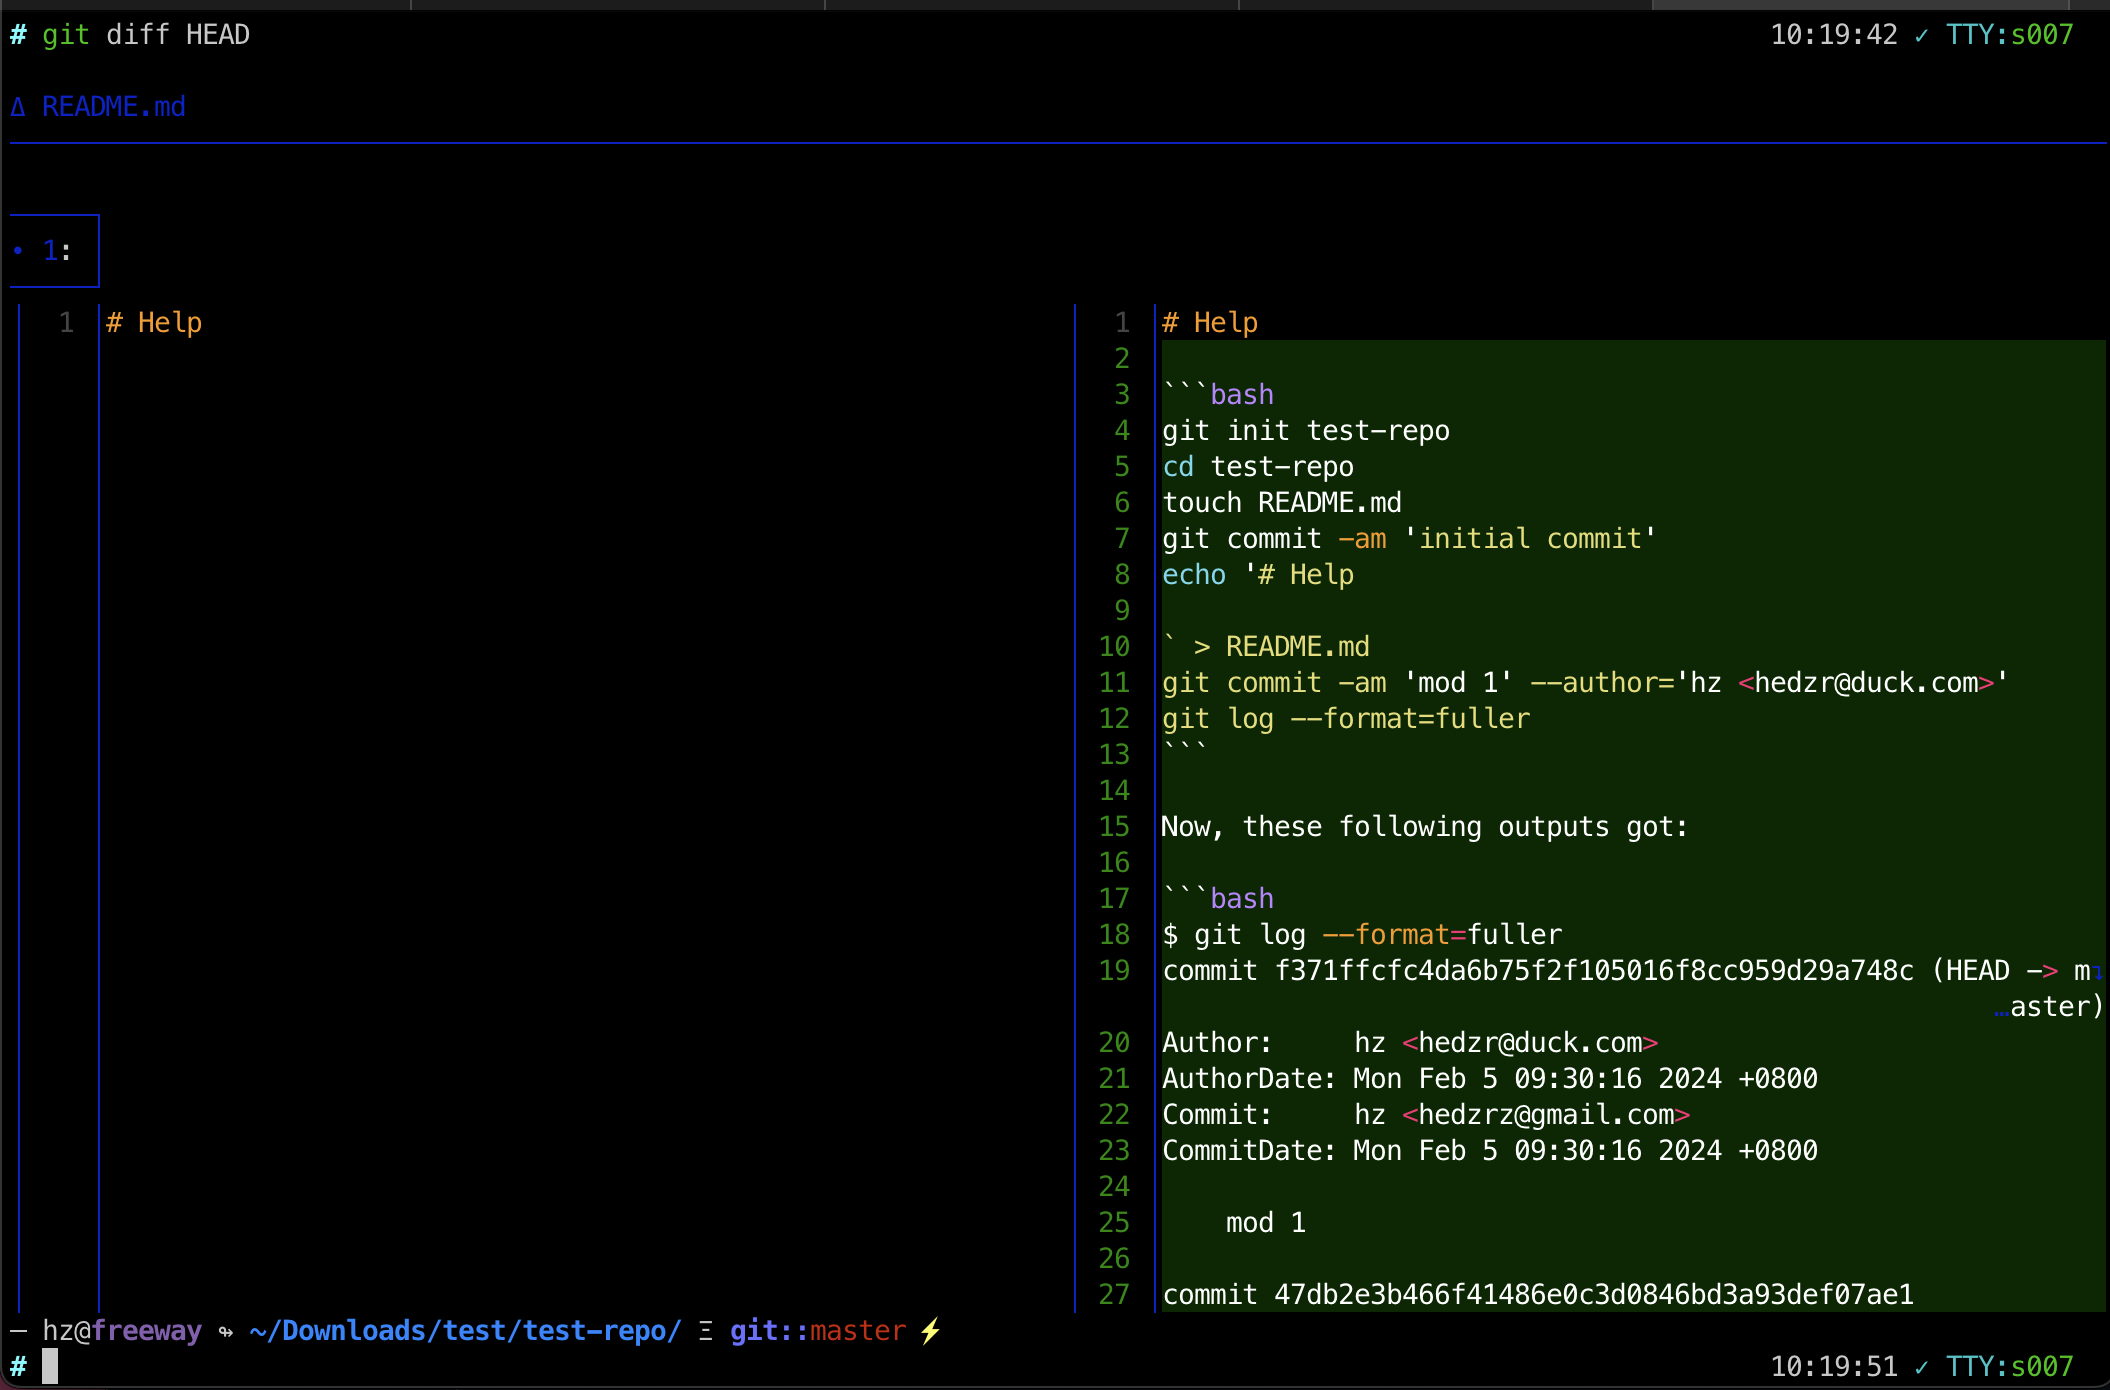
如果使用 Zsh+Powerlevel10K 等环境的话,你可以借助于 定制额外的 Modifier(segment)小组件 来帮助解决状态问题。一个可能的定制环境是这样的:
在提示符的右侧显示了当前的代理状态以及 shell 嵌套层级。
is_darwin
is_darwin 是来自于我的 bash.sh 中的一个小型工具函数。其实现很简短:
1
is_darwin() { [[ $OSTYPE == darwin* ]]; }
所以你可以按需采用。
对于希望集成更多类似小工具的朋友,请查看我们的 bash.sh ,它提供了编写完整的 shell 脚本/ devops 工具脚本的最佳起点 bash.sh,以及:
-
一个额外的、可以被直接引入到
.zshrc/.bashrc的等价物bash.config:1
[ -f $HOME/.bash.sh/bash.config ] && source $HOME/.bash.sh/bash.config
上面的句子可以添加到你的 zshrc 中。
-
一个轻型版本:
bash-lite.sh。它带有更少的函数集合,算是bash.sh/bash.config的轻量级版本。
China Mainland Mirrors
GitHub Clone
通过HTTPS协议Clone仓库的话,可能会遇到速度很慢的情况。
根据经验,在慢的时候中断Clone捎带片刻重复命令的话,你可能会得到正常速度,这种偷鸡的策略适合于小小仓库。
对于大型仓库,改走SSH协议进行clone的话,走到正常速度的几率较大,但此时的速度相较于HTTPS而言通常会有所损耗。
修改 hosts 文件 (基本失效)
但下面还有一种较为费事的方法,通过修改 hosts 文件来完成提速,无需科学也无需代理加速也无需镜像加速(GitHub是不太可能有镜像的)。具体来说请接下去阅读:
首先在 https://www.ipaddress.com/ 查询这三个域名的地址:
- github.com
- assets-cdn.github.com
- github.global.ssl.fastly.net
然后按照查询的结果填写到 /etc/hosts 中,windows用户请查找 %WINDIR%/system32/drivers/etc/hosts 文件。请注意修改 hosts 文件通常需要 sudo 权限 或者管理员权限。修改内容如同下面:
1
2
3
4
5
6
140.82.118.3    github.com
185.199.109.153 assets-cdn.github.com
185.199.111.153 assets-cdn.github.com
185.199.108.153 assets-cdn.github.com
185.199.110.153 assets-cdn.github.com
151.101.113.194 github.global.ssl.fastly.net
如果你有国外的服务器,也可以通过dig指令来查找:
1
2
$ dig github.com +short
140.82.118.3
修改 hosts 文件能够起效的原因有赖于IP未被封禁。但实际上这个并不一定如此,封禁是多种手段同时采用的,此外、不同省份地区的不同运营商的具体动作也会有点区别。
比较根本的方法还是两种,一是在国外VPS直接clone,然后rsync到本机;二是git走SSH协议且启用代理。
Git SSH协议代理
git走SSH协议时,可以在 $HOME/.ssh/config 中为其指定特别约定:
1
2
3
4
5
host github.com
  User git
  Hostname ssh.github.com
  identityFile ~/.ssh/git/id_rsa
  ProxyCommand nc -X 5 -x 127.0.0.1:1080 %h %p
在这里,定制了免密码时所用的SSH私钥 ~/.ssh/git/id_rsa,以及通过 ProxyCommand 指定了转发 git SSH 流量到 127.0.0.1:1080 SOCKS5 代理服务器上。
Git HTTPS协议代理
值得注意的是,如果是使用 Git https 协议的话,你需要指定 HTTPS_PROXY 环境变量到一个 HTTP 代理,从而转发流量。根据我的经验,在这个时候提供一个诸如 socks://127.0.0.1:1080 的 SOCKS4/5 代理,得到的效果会非常有限,不如将该代理包装为 HTTP 后再使用。
如果不想使用 HTTPS_PROXY 环境变量,Git 允许在其全局配置文件 $HOME/.gitconfig 中指定特定主机或者所有主机的专用代理:
1
2
3
4
5
6
7
8
[http "https://skia.googlesource.com"]
	proxy = http://127.0.0.1:8080
[https "https://skia.googlesource.com"]
	proxy = http://127.0.0.1:8080
[http "https://googlesource.com"]
	proxy = http://127.0.0.1:8080
[https "https://googlesource.com"]
	proxy = http://127.0.0.1:8080
综合比较起来,Git 走 SSH 协议且采用一个很好的 SOCKS5 服务器的话,会相当顺利,很难遇到各色怪现象。
生活充满美好
我不应该耗费精力在如何拿到开发资源上,对吗?
对的。一台国外的VPS,美国、日本、香港都是被推荐的地点,在那里下载或者拖到目标内容,无论是 GitHub 还是 golang 的内容,然后 rsync 到本地,看似很复杂,然而往往可以在10min 之内搞定一切事情,胜似在本机上折腾 proxy 8h。
Nothing serious, only explodes without reason.
使用 GitHub 镜像网站
近两年来,即使没有间歇性抽风,全世界也仍然制造了一些 GitHub 的全量镜像网站,它们是有各种各样原因的,一个主要的因素在于 GH 自己泛政治化倾向过于糟糕了,另一方面当然是由于并非只有兔子国才有长城。
所以,如果你并不是在操心怎么 push,仅仅只是为了 pull/fetch/clone 的话,可以使用这些镜像网站来做加速。这个能力对于那些做 DevOps 安装配置工作的人来说是一种福音。
当下,这些镜像网站是值得参考的:
gitclone.com
它特别在于不仅仅只针对 github,为了启用它,执行一条命令:
1
git config --global url."https://gitclone.com/".insteadOf https://
或者做精确的限制:
1
git config --global url."https://gitclone.com/github.com/".insteadOf https://github.com/
然后就可以透明地使用它了,你的 clone 命令无需做任何修改:
1
git clone https://github.com/hedzr/cmdr.git
详情请参阅 官网。
fastgit.org
fastgit 是针对 GitHub 做全量副本的,启用方式为:
1
git config --global url."https://hub.fastgit.xyz/".insteadOf https://github.com/
| 参阅:[Home Page | FastGit UK Document](https://doc.fastgit.org/en-gb/) |
More
此外还有如:https://github.com.cnpmjs.org/
此外,GitHub 可以直达
在很多时候你可能没有注意到 GitHub 的网页,以及 git clone 都是可以直达的。
也就是说,咱们这边也并没有刻意关闭大家的编程、分享路径。
当然,githubusercontents 等等资源站域名还是需要代理才能访问的。
但是确确实实地 GH 上有很多政治化倾向很严重的 repos。不仅如此,GH 自己也封锁了太多敌对国程序员的帐户。
我是一个纯粹的技术人,对于技术的政治化是不赞同的。然而即使不去看那些 fan-zhong 的 repos,也不能忽视一个非常严重的问题:GitHub 也会在未来某一天封掉我的帐户,只因为我是中国人,或者采用中国的 IP 访问这里。作为对于中美关系悲观的一个想做纯粹技术人而不可得的我,无可奈何地看到这个未来的事实,感觉是很奇特的。
尽管我也在寻求其它的技术贡献的去政治化的途径,但天下哪有什么净土!Gitlab,BitBucket,Google,它们在政治化封锁上又能比 GitHub 和 Microsoft 好到哪里去呢?
我应该学俄语吗,去那边找找开源托管平台?想到恩格斯5、60岁用了几个月时间就学会了一门外语,我想我也不应该服老,对不对?
这些感触,其实从疫情开始、中美恶化时就已经有了,不过一直未有宣诸于口。
但是还是应该记录下来,正好此刻更新一下 proxy_set 脚本的实现,就顺便存档吧。
Docker CE
Docker CE 的具体加速办法有很多种,然而各种版本的本质都是一样的,一般来说你需要找到 docker daemon 的配置文件 /etc/docker/daemon.json,然后修改它像这样:
1
2
3
4
5
6
7
8
9
10
11
12
13
14
15
{
  "insecure-registries": [
    "registry.mirrors.aliyuncs.com"
  ],
  "debug": true,
  "experimental": false,
  "registry-mirrors": [
    "https://mirror.ccs.tencentyun.com",
    "https://hub-mirror.c.163.com",
    "https://docker.mirrors.ustc.edu.cn",
    "https://dockerhub.azk8s.cn",
    "https://reg-mirror.qiniu.com",
    "https://registry.docker-cn.com"
  ]
}
如果你在这个文件中自定义了其他项目,或者这个文件中已经存在其他定义,请注意保持。
参考:https://docs.docker.com/engine/reference/commandline/dockerd/#daemon-configuration-file
附加说明:
| 镜像加速器 | 镜像加速器地址 | 其它加速? |
|---|---|---|
| Docker 中国官方镜像 | https://registry.docker-cn.com |
Docker Hub |
| Azure 中国镜像 | https://dockerhub.azk8s.cn |
Docker Hub、GCR、Quay |
| 科大镜像站 | https://docker.mirrors.ustc.edu.cn |
Docker Hub、GCR、Quay |
| 七牛云 | https://reg-mirror.qiniu.com |
Docker Hub、GCR、Quay |
| 网易云 | https://hub-mirror.c.163.com |
Docker Hub |
| 腾讯云 | https://mirror.ccs.tencentyun.com |
Docker Hub |
Alpine Apk
清华提供一种Apk源加速方式:https://mirror.tuna.tsinghua.edu.cn/help/alpine/
在终端输入以下命令以替换TUNA镜像源: sed -i 's/dl-cdn.alpinelinux.org/mirrors.tuna.tsinghua.edu.cn/g' /etc/apk/repositories
1
sed -i 's/dl-cdn.alpinelinux.org/mirrors.tuna.tsinghua.edu.cn/g' /etc/apk/repositories
制作 Docker 镜像时,这是很有用的,节约生命真的是美德。
Android SDK
国内有多家组织提供 Android SDK的镜像缓存,甚至个人也可以很容易地建立这样的缓存,如果你有国内访问速度很好的国外服务器的话。
但是,随着时间推移,现在这些镜像基本上都已失效了。
取而代之的是,目前,Android的官方源是可以直连的,且能达到正常速度,所以还是赶紧滴做点负责任的app出来吧,不要只是会矽肺或者偷偷上传神马的。
Arch Linux Pacman
清华提供一种 Arch Linux 软件仓库加速方式:https://mirror.tuna.tsinghua.edu.cn/help/archlinux/
编辑 /etc/pacman.d/mirrorlist, 在文件的最顶端添加: Server = https://mirrors.tuna.tsinghua.edu.cn/archlinux/$repo/os/$arch
更新软件包缓存: sudo pacman -Syy
curl
可以给 curl 挂上 socks5 的代理。
在~/.curlrc文件中输入代理地址即可。
1
socks5 = "127.0.0.1:1080"
也可以一次性:
1
curl -x socks5://127.0.0.1:1080 https://www.google.com
如果临时不需要代理使用以下参数:
1
curl --noproxy "*" https://www.google.com
EnvVar
环境变量 ALL_PROXY, HTTP_PROXY, HTTPS_PROXY 也对 curl 有效
Special
你甚至可以通过 http_proxy 直接使用 socks5 代理:
1
2
export http_proxy=socks5://127.0.0.1:1080
export https_proxy=$http_proxy
经验证明,这种方式(通过 http_proxy 来使用 socks5 代理)通常是不好使的,你应该寻求一个转换工具将 socks5 转换到 http 代理,才能在命令行中最好地借用代理的能力。
环境变量如果区分大小写(如Linux/mac),则上述语句应该为大写形式重复一次,以免遗漏。
快速别名
1
2
alias setproxy="export http_proxy=socks5://127.0.0.1:1080; export https_proxy=$http_proxy; echo 'HTTP Proxy on';"
alias unsetproxy="unset http_proxy; unset https_proxy; echo 'HTTP Proxy off';"
更好的
同时适用于 zsh 和 bash 的脚本片段如下,将其粘贴到 .bashrc/.zshrc 中重新开启终端会话即可享受:
1
2
3
4
5
6
7
8
9
10
11
12
13
14
15
16
17
proxy_set(){
  local onoff=${1:-usage}
  case $onoff in
  on|ON|1|yes|ok|enable|enabled|open|allow)
    export http_proxy=http://127.0.0.1:8001
    export https_proxy=$http_proxy https_proxy=$http_proxy HTTPS_PROXY=$http_proxy
    echo 'HTTP Proxy on (http)'
    ;;
  off|OFF|0|no|bad|disable|disabled|close|disallow|deny)
    unset all_proxy http_proxy https_proxy HTTP_PROXY HTTPS_PROXY
    echo 'HTTP Proxy off (http)'
    ;;
  usage)
    echo 'Usage: proxy_set on|off|enable|disable|allow|deny'
    ;;
  esac
}
使用时,直接 proxy_set on 或者 proxy_set off 即可。
Flutter & Dart Pub
flutter 官网有专门的页面讲述加速问题:
https://flutter.dev/community/china
Flutter 镜像安装帮助
Flutter 是一款跨平台的移动应用开发框架,由 Google 开源。用 Flutter 开发的应用可以直接编译成 ARM 代码运行在 Android 和 iOS 系统上。
可以使用清华镜像:https://mirror.tuna.tsinghua.edu.cn/help/flutter/
Flutter 安装时需要从 Google Storage 下载文件,如您的网络访问 Google 受阻,建议使用本镜像。使用方法为设置环境变量 FLUTTER_STORAGE_BASE_URL,并指向 TUNA 镜像站。
1
$ export FLUTTER_STORAGE_BASE_URL="https://mirrors.tuna.tsinghua.edu.cn/flutter"
若希望长期使用 TUNA 镜像:
1
$ echo 'export FLUTTER_STORAGE_BASE_URL="https://mirrors.tuna.tsinghua.edu.cn/flutter"' >> ~/.bashrc
此外 Flutter 开发中还需要用到 Dart 语言的包管理器 Pub,其镜像使用方法参见Pub 镜像安装帮助。
Go Modules
使用 Golang v1.11 以上,为你的项目启用 Go Modules 功能,然后就可以使用 GOPROXY 环境变量来透明地使用镜像代理。
比较著名的大陆加速器为:
1
2
export GOPROXY=https://goproxy.cn
# Windows 应该使用 set GOPROXY=xxxx 语法
然后 go mod download 以及 go mod tidy 就足够快了。
如果你想搭建私服,可以遵循 Go Modules 的 API 规范自己实现一个代理服务器,也可以使用开源的 athens 项目自建一个服务器。
如果使用 Golang 1.13 以上版本的话,以下语法可用:
1
2
export GOPROXY=https://goproxy.cn,https://goproxy.io,https://gocenter.i
o,direct
参考
关于中国的 goproxy.cn:干货满满的Go Modules 和goproxy.cn - 掘金
| 关于 go 1.13 的 Modules:[Go module 再回顾 | 鸟窝](https://colobu.com/2019/09/23/review-go-module-again/) |
关于 athens 实现以及 Go Modules Communicated Protocol: Go modules and project Athens - Speechmatics, Athens Official Site: https://docs.gomods.io/。
关于 Go Modules 的通讯协议:为Go module 搭建私服 以及 The Design of Athens:
- Proxy internals - basics of the Athens proxy architecture and major features
- Communication flow - how the Athens proxy interacts with the outside world to fetch and store code, respond to user requests, and so on
Gradle
Gradle的配置文件为~/.gradle/init.gradle:
1
2
3
4
5
6
7
8
9
10
11
12
13
14
allprojects {
	repositories {
		maven {
			url 'https://maven.aliyun.com/repository/public/'
		}
	}
	buildscript {
		repositories {
			maven {
				url 'https://maven.aliyun.com/repository/public/'
			}
		}
	}
}
以下的镜像可以选用
- 华为:https://mirrors.huaweicloud.com/repository/maven/
- 网易:https://mirrors.163.com/maven/repository/maven-public/
Gem 和 CocoaPods
替换 Ruby 源
首先是 gem 和 ruby 的源应该被替换
移除现有的Ruby镜像
1
$ gem sources --remove https://rubygems.org
添加国内最新镜像
1
$ gem sources -a https://gems.ruby-china.com
查看当前镜像
1
$ gem sources -l
编辑 ~/.gemrc 也可以
bundler
对于 Ruby 开发,bundler可能需要如下的操作:
1
bundle config mirror.https://rubygems.org https://mirrors.tuna.tsinghua.edu.cn/rubygems
参考清华镜像:https://mirrors.tuna.tsinghua.edu.cn/help/rubygems/
或者:http://bundler.io/v1.16/man/bundle-config.1.html#MIRRORS-OF-GEM-SOURCES
加速 Cocoapods
几种加速方法,可能需要自己实际测试那种效果最好。
gitee镜像
1
2
3
pod repo remove master
pod repo add master https://gitee.com/mirrors/CocoaPods-Specs
pod repo update
清华镜像
1
2
3
pod repo remove master
pod repo add master https://mirrors.tuna.tsinghua.edu.cn/git/CocoaPods/Specs.git
pod repo update
对于 Cocoapods 新的版本,需要使用如下的方法:
1
2
3
pod repo remove master
cd ~/.cocoapods/repos
git clone https://mirrors.tuna.tsinghua.edu.cn/git/CocoaPods/Specs.git master
你的 xcode 工程中如果有Podfile的话,请修改加入下面的行:
1
2
source 'https://gitee.com/mirrors/CocoaPods-Specs.git'
source 'https://mirrors.tuna.tsinghua.edu.cn/git/CocoaPods/Specs.git'
Homebrew
macOS 中都会安装 Homebrew,但 brew update 可能会很慢。加速的办法是替换现有的上游:
1
2
3
4
5
6
7
git -C "$(brew --repo)" remote set-url origin https://mirrors.tuna.tsinghua.edu.cn/git/homebrew/brew.git

git -C "$(brew --repo homebrew/core)" remote set-url origin https://mirrors.tuna.tsinghua.edu.cn/git/homebrew/homebrew-core.git

git -C "$(brew --repo homebrew/cask)" remote set-url origin https://mirrors.tuna.tsinghua.edu.cn/git/homebrew/homebrew-cask.git

brew update
复原
(感谢Snowonion Lee提供说明)
1
2
3
4
5
6
7
git -C "$(brew --repo)" remote set-url origin https://github.com/Homebrew/brew.git

git -C "$(brew --repo homebrew/core)" remote set-url origin https://github.com/Homebrew/homebrew-core.git

git -C "$(brew --repo homebrew/cask)" remote set-url origin https://github.com/Homebrew/homebrew-cask.git

brew update
以上内容从清华开源上复制:Homebrew 镜像使用帮助
如果想阻止 brew 指令运行时总是尝试去自动更新,可以设置环境变量:
1
2
# forbit autoupdate on homebrew installing
export HOMEBREW_NO_AUTO_UPDATE=1
Pub 镜像安装帮助
Pub 是 Dart 官方的包管理器。跨平台的前端应开发 框架 Flutter 也基于 Dart 并且可以使用大部分 Pub 中的 库。
如果希望通过 TUNA 的 pub 镜像安装软件,只需要设置 PUB_HOSTED_URL 这个环境变量指向 https://mirrors.tuna.tsinghua.edu.cn/dart-pub/ 即可。
以 bash 为例,临时使用 TUNA 的镜像来安装依赖:
1
2
$ PUB_HOSTED_URL="https://mirrors.tuna.tsinghua.edu.cn/dart-pub/" pub get # pub
$ PUB_HOSTED_URL="https://mirrors.tuna.tsinghua.edu.cn/dart-pub/" flutter packages get # flutter
若希望长期使用 TUNA 镜像:
1
$ echo 'export PUB_HOSTED_URL="https://mirrors.tuna.tsinghua.edu.cn/dart-pub/"' >> ~/.bashrc
Maven
采用aliyun镜像
编辑 $HOME/.m2/settings.xml,找到 <mirrors> 小节,添加如下内容:
1
2
3
4
5
6
7
8
9
10
11
12
13
14
15
16
17
18
19
20
21
22
23
24
25
26
27
28
29
30
31
32
33
34
35
36
37
38
39
40
41
42
43
44
45
46
47
48
49
50
51
52
53
54
55
56
57
58
59
60
61
62
63
64
65
66
67
68
69
70
71
72
73
74
75
76
77
78
79
80
81
82
83
<mirror>
    <id>aliyun-public</id>
    <mirrorOf>*</mirrorOf>
    <name>aliyun public</name>
    <url>https://maven.aliyun.com/repository/public</url>
</mirror>

<mirror>
    <id>aliyun-central</id>
    <mirrorOf>*</mirrorOf>
    <name>aliyun central</name>
    <url>https://maven.aliyun.com/repository/central</url>
</mirror>

<mirror>
    <id>aliyun-spring</id>
    <mirrorOf>*</mirrorOf>
    <name>aliyun spring</name>
    <url>https://maven.aliyun.com/repository/spring</url>
</mirror>

<mirror>
    <id>aliyun-spring-plugin</id>
    <mirrorOf>*</mirrorOf>
    <name>aliyun spring-plugin</name>
    <url>https://maven.aliyun.com/repository/spring-plugin</url>
</mirror>

<mirror>
    <id>aliyun-apache-snapshots</id>
    <mirrorOf>*</mirrorOf>
    <name>aliyun apache-snapshots</name>
    <url>https://maven.aliyun.com/repository/apache-snapshots</url>
</mirror>

<mirror>
    <id>aliyun-google</id>
    <mirrorOf>*</mirrorOf>
    <name>aliyun google</name>
    <url>https://maven.aliyun.com/repository/google</url>
</mirror>

<mirror>
    <id>aliyun-gradle-plugin</id>
    <mirrorOf>*</mirrorOf>
    <name>aliyun gradle-plugin</name>
    <url>https://maven.aliyun.com/repository/gradle-plugin</url>
</mirror>

<mirror>
    <id>aliyun-jcenter</id>
    <mirrorOf>*</mirrorOf>
    <name>aliyun jcenter</name>
    <url>https://maven.aliyun.com/repository/jcenter</url>
</mirror>

<mirror>
    <id>aliyun-releases</id>
    <mirrorOf>*</mirrorOf>
    <name>aliyun releases</name>
    <url>https://maven.aliyun.com/repository/releases</url>
</mirror>

<mirror>
    <id>aliyun-snapshots</id>
    <mirrorOf>*</mirrorOf>
    <name>aliyun snapshots</name>
    <url>https://maven.aliyun.com/repository/snapshots</url>
</mirror>

<mirror>
    <id>aliyun-grails-core</id>
    <mirrorOf>*</mirrorOf>
    <name>aliyun grails-core</name>
    <url>https://maven.aliyun.com/repository/grails-core</url>
</mirror>

<mirror>
    <id>aliyun-mapr-public</id>
    <mirrorOf>*</mirrorOf>
    <name>aliyun mapr-public</name>
    <url>https://maven.aliyun.com/repository/mapr-public</url>
</mirror>
也可以采用 profile 方式,这里就不再赘述了。
Node 和 npm/Yarn
可以更换镜像:
- 阿里:
yarn config set registry https://registry.npmmirror.com - 华为:
yarn config set registry https://mirrors.huaweicloud.com/repository/npm/ - Node-Sass:
npm config set sass_binary_site https://mirrors.huaweicloud.com/node-sass/
1
2
3
4
5
6
7
npm config delete registry

yarn --registry=https://registry.company.com/

yarn config get registry
yarn config delete registry
yarn config set registry
Python pip 和 composer
Pip
- 清华:
pip config set global.index-url https://pypi.tuna.tsinghua.edu.cn/simple - 阿里:
pip config set global.index-url https://mirrors.aliyun.com/pypi/simple/ - 华为:
pip config set global.index-url https://mirrors.huaweicloud.com/repository/pypi/simple - 豆瓣:
pip config set global.index-url https://pypi.douban.com/simple
1
2
3
4
5
6
7
8
9
10
# 以下可以选用其一

# 清华:
pip config set global.index-url https://pypi.tuna.tsinghua.edu.cn/simple
# 阿里:
pip config set global.index-url https://mirrors.aliyun.com/pypi/simple/
# 华为:
pip config set global.index-url https://mirrors.huaweicloud.com/repository/pypi/simple
# 豆瓣:
pip config set global.index-url https://pypi.douban.com/simple
Composer
1
2
3
4
5
6
7
8
9
# 以下可以选用其一

# 阿里:
composer config -g repo.packagist composer https://mirrors.aliyun.com/composer/
# 华为:
composer config -g repo.packagist composer https://mirrors.huaweicloud.com/repository/php/

# Laravel中文网
composer config -g repo.packagist composer https://packagist.laravel-china.org
Sequel
完成pip加速配置之后,$HOME/.pip/pip.conf 看起来可能会像这样:
1
2
3
4
5
6
7
8
9
10
11
12
13
14
15
16
17
[global]
#index-url = http://pypi.mirrors.ustc.edu.cn/simple

trusted-host =  mirrors.aliyun.com
index-url = http://mirrors.aliyun.com/pypi/simple
# index-url = http://pypi.douban.com/simple
# trusted-host = pypi.douban.com
disable-pip-version-check = true
timeout = 120

[install]
ignore-installed = true
# 不自动安装依赖的时候设置此选项
# no-dependencies = yes

[list]
format = columns
R CRAN
采用清华开源站:
CRAN (The Comprehensive R Archive Network) 镜像源配置文件之一是 .Rprofile (linux 下位于 ~/.Rprofile )。
在文末添加如下语句:
1
options("repos" = c(CRAN="https://mirrors.tuna.tsinghua.edu.cn/CRAN/"))
打开 R 即可使用该 CRAN 镜像源安装 R 软件包。
也可以使用其他镜像站:
- https://mirror.lzu.edu.cn/CRAN
- …
如果使用 R Console,可以在 Perferences 设置对话框中直接设置官方镜像的上海、香港、兰州等节点。
Rust Cargo 和 Rustup
Rust 使用 creates.io,国内也有相应的提速手段:
https://lug.ustc.edu.cn/wiki/mirrors/help/rust-crates
首先你需要在 $HOME/.cargo/config 中添加如下内容
1
2
3
4
[registry]
index = "git://mirrors.ustc.edu.cn/crates.io-index"
# Or
# index = "http://mirrors.ustc.edu.cn/crates.io-index"
如果 cargo 版本为 0.13.0 或以上, 需要更改 $HOME/.cargo/config 为以下内容:
1
2
3
4
5
[source.crates-io]
registry = "https://github.com/rust-lang/crates.io-index"
replace-with = 'ustc'
[source.ustc]
registry = "git://mirrors.ustc.edu.cn/crates.io-index"
有兴趣自建的朋友,可以看看:
https://github.com/rust-lang/crates.io/blob/master/docs/MIRROR.md
清华TUNA 也有 rustup 相应的镜像
1
2
3
# export CARGO_HOME=$HOME/.cargo
# export RUSTUP_HOME=$HOME/.rustup
export RUSTUP_DIST_SERVER=https://mirrors.tuna.tsinghua.edu.cn/rustup
详见:https://mirror.tuna.tsinghua.edu.cn/help/rustup/
Fixup
对于上面的镜像站的提示来说,有一定的问题,你有可能遇到这样的问题:
1
warning: Signature verification failed for 'https://mirrors.tuna.tsinghua.edu.cn/rustup/dist/channel-rust-stable.toml'
这是由于它们提供的方法有微小的问题:你不应该使用 RUSTUP_DIST_SERVER 环境变量,而是应该使用 RUSTUP_UPDATE_ROOT 变量名。所以正确的环境变量设置应该以下面的示例为准:
1
2
3
4
5
export CARGO_HOME=$HOME/.cargo
export RUSTUP_HOME=$HOME/.rustup
#export RUSTUP_DIST_SERVER=https://mirrors.tuna.tsinghua.edu.cn/rustup
#export RUSTUP_UPDATE_ROOT=$RUSTUP_DIST_SERVER/rustup
export RUSTUP_UPDATE_ROOT=https://mirrors.tuna.tsinghua.edu.cn/rustup/rustup
此外,旧的升级方法也有所废弃,现在你要升级 rustc 和 cargo 版本的话,需要如下的命令:
1
rustup update stable
其它的旧指令都可以忘记。
另外,一个“正确”的 $HOME/.cargo/config 文件应该如此:
1
2
3
4
5
6
7
8
[source]

[source.crates-io]
# registry = "https://github.com/rust-lang/crates.io-index"
replace-with = 'ustc'

[source.ustc]
registry = "git://mirrors.ustc.edu.cn/crates.io-index"
不要给出多余的 registry 变量,它可能会是 Update cargo.io indexes 挂起的原因。
Ubuntu Apt Source
如果你使用桌面版本,则 Ubuntu 的软件源设置中,你可以选取最近的地区,例如中国大陆,从而加速软件包下载速度。
如果使用 Server 版本,则可以明确地使用清华镜像(或者自行使用其他镜像)
1
2
3
4
5
6
7
8
9
10
11
12
13
# 默认注释了源码镜像以提高 apt update 速度,如有需要可自行取消注释
deb https://mirrors.tuna.tsinghua.edu.cn/ubuntu/ bionic main restricted universe multiverse
# deb-src https://mirrors.tuna.tsinghua.edu.cn/ubuntu/ bionic main restricted universe multiverse
deb https://mirrors.tuna.tsinghua.edu.cn/ubuntu/ bionic-updates main restricted universe multiverse
# deb-src https://mirrors.tuna.tsinghua.edu.cn/ubuntu/ bionic-updates main restricted universe multiverse
deb https://mirrors.tuna.tsinghua.edu.cn/ubuntu/ bionic-backports main restricted universe multiverse
# deb-src https://mirrors.tuna.tsinghua.edu.cn/ubuntu/ bionic-backports main restricted universe multiverse
deb https://mirrors.tuna.tsinghua.edu.cn/ubuntu/ bionic-security main restricted universe multiverse
# deb-src https://mirrors.tuna.tsinghua.edu.cn/ubuntu/ bionic-security main restricted universe multiverse

# 预发布软件源,不建议启用
# deb https://mirrors.tuna.tsinghua.edu.cn/ubuntu/ bionic-proposed main restricted universe multiverse
# deb-src https://mirrors.tuna.tsinghua.edu.cn/ubuntu/ bionic-proposed main restricted universe multiverse
以上例子为 18.04 版本的替换内容。你可以直接访问清华开源站查找其他版本:
https://mirror.tuna.tsinghua.edu.cn/help/ubuntu/
其他方法
https://askubuntu.com/questions/39922/how-do-you-select-the-fastest-mirror-from-the-command-line
使用 apt-select
可以用 pip 安装它:
1
pip install apt-select
然后运行它并跟随提示走:
1
apt-select --country US -t 5 --choose
使用mirrors CDN
apt-get now supports a ‘mirror’ method that will automatically select a good mirror based on your location. Putting:
1
2
3
4
deb mirror://mirrors.ubuntu.com/mirrors.txt precise main restricted universe multiverse
deb mirror://mirrors.ubuntu.com/mirrors.txt precise-updates main restricted universe multiverse
deb mirror://mirrors.ubuntu.com/mirrors.txt precise-backports main restricted universe multiverse
deb mirror://mirrors.ubuntu.com/mirrors.txt precise-security main restricted universe multiverse
on the top in your /etc/apt/sources.list file should be all that is needed to make it automatically pick a mirror for you based on your geographical location.
你可以无脑地使用 sed 来搞定:
1
sudo sed -i 's%us.archive.ubuntu.com/ubuntu/%mirrors.ubuntu.com/mirrors.txt%' /etc/apt/sources.list
Ubuntu PPA Source
PPA 一般我都是硬来。但是久而久之也就不能忍了,所以它也可以替换国内源的,就干吧。
launchpad.proxy.ustclug.org 废了
本来 launchpad.proxy.ustclug.org 是很不错的镜像,但是已经废了:
1
2
3
4
5
sudo add-apt-repository ppa:longsleep/golang-backports
find /etc/apt/sources.list.d/ -type f -iname '*.list' -exec sudo sed -ibak -r 's/ppa.launchpad.net/launchpad.proxy.ustclug.org/' {} \;

sudo apt update
sudo apt install golang-1.18 golang-go
Vagrant
没有简单的办法。一些周知的镜像,可以通过这些地方加速:
-
对于 Ubuntu 之类,可以取清华镜像
1
2
3
vagrant box add ubuntu/trusty64 https://mirrors.tuna.tsinghua.edu.cn/ubuntu-cloud-images/vagrant/trusty/current/trusty-server-cloudimg-amd64-vagrant-disk1.box

vagrant box add ubuntu/bionic64 https://mirrors.tuna.tsinghua.edu.cn/ubuntu-cloud-images/bionic/20191002/bionic-server-cloudimg-amd64-vagrant.box
-
清华找不到几个周知镜像,所以基本上还是要在 http://www.vagrantbox.es/ 寻找和添加
1
vagrant box add debian/8.1 https://github.com/kraksoft/vagrant-box-debian/releases/download/8.1.0/debian-8.1.0-amd64.box
-
总的来说,没有什么有效的镜像,只能想各种办法去手工下载box,然后再导入。
Conclusion
LICENSE: CC4-BY-NC-SA
https://github.com/hedzr/mirror-list


留下评论